
This is loosely based on an excerpt from the BUILDHLP.TXT file included with the official Duke Nukem 3D: Atomic Edition CD. I've fixed errors and added virtually every texture worth mentioning. However, this list is not exhaustive: There are still a few minor coded textures that are not listed, and some objects may be affected by angles, tags, or attributes, even though they are not documented here. As a general guideline, 'inactive' sprites tend to be compatible with all attributes, while 'active' sprites are usually more limited in this regard, but this varies depending on their individual code. Note that the descriptive term "Multiplayer" includes Co-Operative mode, whereas "DukeMatch" does not.
Sprites
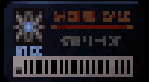
TEXTURE# 1 SECTOREFFECTOR

The SectorEffector is used to manipulate sector attributes and create the game effects. Some SectorEffector functions can be combined.
Lo-Tag : A predefined number which tells a sector how to act. Check the "References - Sector/Effector Tags" section for the detailed list.
Hi-Tag : Channel. Used to link another SectorEffector with the same Lo-Tag so they activate together.
Other : Set Palette, Shade, Angle, Height, etc, according to the rules of the selected effect.
TEXTURE# 2 ACTIVATOR

The Activator is used to activate the sector Lo-Tag function or SectorEffectors within the sector.
Lo-Tag : Channel. Set equal to a sprite's Lo-Tag used to activate it (such as a Switch, Access Switch, or Touchplate).
Hi-Tag : [0] = Default. [1] = Open door only. [2] = Close door only. The latter two modes are only intended to work with vertical doors.
TEXTURE# 3 TOUCHPLATE

The Touchplate will activate an Activator, ActivatorLocked, or MasterSwitch when triggered by the player's presence.
Lo-Tag : Channel. Set equal to an Activator, ActivatorLocked, or MasterSwitch Lo-Tag.
Hi-Tag : [0] = Activate every time the player triggers the Touchplate. [>0] = Activate this many times then never again.
Palette : [>0] = Single-Player-only (the only known sprite which does the exact opposite of the usual palette effect).
Angle : [Down] = Activate when the player enters the sector. [Up] = Activate only when the player steps on the floor of the sector.
Height : If the Touchplate is not at the same height as the floor of the sector, it will function as an "automatic floor rise/lower" effect. The Touchplate height determines the floor's initial height, and the sector floor height determines where it will raise/lower to when triggered. This does not require a Channel value to work. However, "automatic floor rise/lower" Touchplates sharing a Channel value will trigger each other, and you can even place more than one of them in the same sector to create a "springboard" floor function (although this effect isn't perfect and tends to get stuck). In the case of multiple Touchplates being in the same sector, the initial height of the floor is determined by the height of the Touchplate with the highest sprite number (i.e. newest by order of placement). The "automatic floor rise/lower" effect is silent, but the Channel could be used to activate other effects with MusicAndSFX. All other attributes of the Touchplate will apply as usual. Note that an "automatic floor rise/lower" Touchplate effect will conflict with other effects which raise/lower the floor if they are located within the same sector. Many of them will react in unexpected and interesting ways, some of which are undoubtedly useful.
GPSpeed Lo-Tag : If the "automatic floor rise/lower" effect is used, this will determine its speed. The default speed of the effect is equivalent to using a GPSpeed with a value of 256.
TEXTURE# 4 ACTIVATORLOCKED

The ActivatorLocked locks a sector's Lo-Tag function until the player unlocks it with a trigger. Most triggers cause a "unlocked"/"locked" message to be displayed.
Lo-Tag : Channel. Set equal to a sprite's Lo-Tag used to unlock it (such as a Switch, Access Switch, or Touchplate).
TEXTURE# 5 MUSICANDSFX

The MusicAndSFX sprite can be used in a few different ways:
- Activation Sound
When used in a sector with a Lo-Tag, the sound will play when the sector's Lo-Tag function is activated.
Lo-Tag : Primary sound number.
Hi-Tag : Secondary sound number.
Palette : [1] = Multiplayer-only. - Ambient Sound
When used in a sector without a Lo-Tag (although there are some exceptions), an ambient sound will be played.
Lo-Tag : Ambient sound number.
Hi-Tag : Maximum audible radius from center (1024 = The largest grid square).
Palette : [1] = Multiplayer-only. - Random-Ambient Sound
When used in a sector without a Lo-Tag (although there are some exceptions), and with a 'random-ambient' compatible sound, a user-determined range of sounds will be played in a random order at random intervals. The sound will be globally heard anywhere within the sector. A random sound will always be triggered immediately upon the player's first entry into the sector. If the player starts the game within the sector, the same initial sound will always be chosen (probably a byproduct of the methods used to randomize). Note that the range value is the consecutive range following the base sound, so a range value of 3 would actually include 4 sounds (the base sound, and the next 3 consecutive sounds).
Lo-Tag : Base sound.
Hi-Tag : Consecutive range of sounds (after the Base sound).
Palette : [1] = Multiplayer-only. - Echo Effect
When used in a sector without a Lo-Tag, all sounds will have an echo effect.
Lo-Tag : 1000 + the amount of echo from 0-255.
Hi-Tag : Maximum audible radius from center (1024 = The largest grid square).
Palette : [1] = Multiplayer-only.
TEXTURE# 6 LOCATORS

The Locator is used to define the series of points that a Recon Patrol Vehicle or a Subway Vehicle/Two-Way Train will follow. You can only have one Locator path set in a sector. You cannot have a Recon Patrol Vehicle and a Subway Vehicle/Two-Way Train in the same map.
Lo-Tag : Set in an increasing order beginning with 0. When the vehicle reaches the last point, it will loop back to the Locator with Lo-Tag 0. Two-Way Trains only use two Locators.
Hi-Tag : If set to 1, the Subway Vehicle will stop at that point for approximately 5 seconds, then continue. The Recon Patrol Vehicle and Two-Way Train are not affected.
TEXTURE# 7 CYCLER

The Cycler is used to make a sector pulsate in brightness. It is often used with a GPSpeed to set the pulsating speed.
Lo-Tag : Sets the initial brightness offset. To make a travelling light effect, use multiple Cyclers with incremental offset values, and multiple GPSpeed sprites with a constant pulse speed value.
Hi-Tag : Channel. Set equal to a sprite's Lo-Tag used to activate it (such as a Switch, Access Switch, or Touchplate).
Palette : The Cycler palette has no effect. The sector palette will be permanent.
Shade : Set the Cycler shade to when the light is at its brightest point. Set the sector shade to when the light is at its darkest point.
Angle : [Down] = Begin in the 'disabled' state. [Up] = Begin in the 'enabled' state.
GPSpeed Lo-Tag : Sets the rate of the light pulse. Value ranges from 1 (roughly one cycle every 120 seconds) to 1023 (roughly eight cycles per second). The default speed of the effect is equivalent to using a GPSpeed with a value of 256.
TEXTURE# 8 MASTERSWITCH

The MasterSwitch activates Sector Lo-Tags or SectorEffectors. It is very similar to the Activator, except it has a time-delay ability and it only activates once (after which the player will have manual control, if feasible). It will also detonate any SEENINE/OOZFILTER explosives in the sector, regardless of their tag values.
Lo-Tag : Channel. Set equal to a sprite's Lo-Tag used to activate it (such as a Switch, Access Switch, or Touchplate).
Hi-Tag : Set time-delay until action occurs (a value of 30 = 1 second).
TEXTURE# 9 RESPAWN

The Respawn is used to spawn an actor or an item when triggered by an action, or when the player kills an actor.
Lo-Tag : Channel. Set equal to a sprite's Lo-Tag used to trigger it (Switch, Access Switch, Touchplate), or set equal to a FEM actor's Hi-Tag. It can also be triggered directly by an Activator (this is a bit obscure though).
Hi-Tag : Set equal to the sprite number to spawn. Use any sprite number which has a name assigned to it (although many will not be compatible). Check the "References - Compatibility Listings" section for the complete list.
Palette : [>0] = Respawned Boss becomes Mini-Boss affected by palette value (21 is the standard choice) (only the Battlelord is usefully compatible with this feature). [1] = Multiplayer-only (has side-effect of making a Respawned Mini-Boss spawn with palette 1).
Angle : All sprites spawn with an angle value of 0 (facing East on the map grid), regardless of the Respawn sprite's angle.
TEXTURE# 10 GPSPEED

The General Purpose Speed is most commonly used to determine the speed of an effect.
Lo-Tag : Rate of movement.
TEXTURE# 21 FIRSTGUNSPRITE, 22 CHAINGUNSPRITE, 23 RPGSPRITE, 24 FREEZESPRITE, 25 SHRINKERSPRITE, 26 HEAVYHBOMB, 27 TRIPBOMBSPRITE, 28 SHOTGUNSPRITE, 29 DEVISTATORSPRITE, 37 FREEZEAMMO, 40 AMMO, 41 BATTERYAMMO, 42 DEVISTATORAMMO, 44 RPGAMMO, 45 GROWAMMO, 46 CRYSTALAMMO, 47 HBOMBAMMO, 48 AMMOLOTS, 49 SHOTGUNAMMO
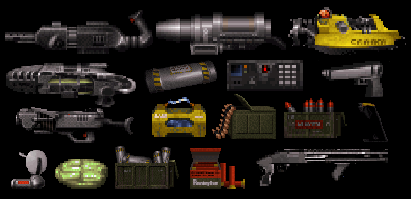
Weapons and Ammo help players defend themselves from enemies, and needlessly shoot things. It is possible to detonate multiple pipebombs by repeatedly switching back to the pipebomb weapon after tossing one. AMMOLOTS is quite unique in that it is completely invisible, yet still gives the player pistol ammo (4 full clips - 48 bullets to be exact).
Lo-Tag : [0/1] = All skill levels. [2] = 2 and higher. [3] = 3 and higher. [4] = 4 only. (Skill settings have no effect on the HEAVYHBOMB.)
Palette : [0] = Appears in all modes. [>0] = Multiplayer-only (1 is the standard choice).
TEXTURE# 51 COLA, 52 SIXPAK, 53 FIRSTAID, 54 SHIELD, 55 STEROIDS, 56 AIRTANK, 57 JETPACK, 59 HEATSENSOR, 61 BOOTS, 100 ATOMICHEALTH, 1348 HOLODUKE
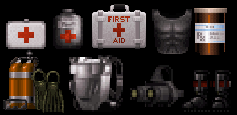
Health and Inventory aid the player throughout a level.
Lo-Tag : [0/1] = All skill levels. [2] = 2 and higher. [3] = 3 and higher. [4] = 4 only.
Palette : [0] = Appears in all modes. [>0] = Multiplayer-only (1 is the standard choice).
TEXTURE# 60 ACCESSCARD
The Access Card is used to unlock an Access Switch. For realism, place it in wall-alignment mode. Access Cards do not appear in DukeMatch (every player will automatically have them).
Palette : [0] = Blue. [21] = Red. [23] = Yellow.
TEXTURE# 130 ACCESSSWITCH, 170 ACCESSSWITCH2
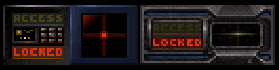
The Access Switch is used to unlock or activate something when used with an Access Card.
Lo-Tag : Channel. Set equal to Activator, ActivatorLocked, or MasterSwitch Lo-Tag to trigger.
Hi-Tag : Activation sound number (optional). Sound #212 is the standard choice. If no value is specified, the default is sound #76.
Palette : [0] = Blue. [21] = Red. [23] = Yellow.
TEXTURE# 132 SLOTDOOR, 133 (slotdoor), 134 LIGHTSWITCH, 135 (lightswitch), 136 SPACEDOORSWITCH, 137 (spacedoorswitch), 138 SPACELIGHTSWITCH, 139 (spacelightswitch), 140 FRANKENSTINESWITCH, 141 (frankenstineswitch), 164 DIPSWITCH2, 165 (dipswitch2), 168 DIPSWITCH3, 169 (dipswitch3), 712 LIGHTSWITCH2, 713 (lightswitch2), 860 POWERSWITCH1, 861 (powerswitch1), 862 LOCKSWITCH1, 863 (lockswitch1), 864 POWERSWITCH2, 865 (powerswitch2), 1111 HANDSWITCH, 1112 (handswitch), 1122 PULLSWITCH, 1123 (pullswitch)
The Switches are used to unlock or activate something. It is technically possible to make any object seemingly function as a switch, simply by placing an "invisible" (one-sided) switch on it and making the switch face away from the player. Remember that you can use the 'enabled' form of the switch textures as alternatives. Note that the default state of a switch determines the default state of a switch-activated light effect connected to the switch. This may be true for some other effects as well, but in most cases the default state of a switch is purely cosmetic. It is also worth noting that HANDPRINTSWITCH (#1155) and #1156 do not function as switches, even though they appear to be defined as switches in the source code.
All of the switches in the game can be triggered by kicking them, and the following switches can also be triggered by the player's gunfire (bullets only): DIPSWITCH (#162), DIPSWITCH2 (#164), DIPSWITCH3 (#168), HANDSWITCH (#1111), and of course, TARGET (#4359) and DUCK (#4361). These switches only respond to bullets, and (strangely) only to those fired by a player. The only exceptions to both of these rules are the TARGET and DUCK sprites, which are explained later in this page.
Lo-Tag : Channel. Set equal to Activator, ActivatorLocked, or MasterSwitch Lo-Tag to trigger.
Hi-Tag : Activation sound number (optional). If no value is specified, the default is sound #76.
Palette : [0] = Appears in all modes. [>0] = DukeMatch-only (1 is the standard choice) (sprite must also be wall-aligned).
Angle : Set to the direction that you want the sprite to fall when shot (only applies to the TARGET and DUCK sprites).
TEXTURE# 142 NUKEBUTTON
The Nuke Button is used to end a level. It can also be used to go to a secret level within the same episode. In EDuke32, the maximum number of levels per episode has been increased to 32 (from the original game's maximum of 11). The Secret-Level Nuke Button has been updated to accommodate for this increase accordingly.
Note: If a two-sided wall is blocked and has a non-zero overtile value (i.e. any masked texture except the default brown brick texture) assigned to it, the player will not be able to press 'through' the wall to activate a Nuke Button on the other side (even if the wall is unmasked). This also occurs if the two-sided wall is only blocked on one side (the side that the player is trying to press through). There are many cases in the original levels where the Nuke Button is encased in glass and cannot be activated until the glass is smashed, so this "feature" was certainly intentional.
Lo-Tag : Any value from [0,1] to [0,65535] is valid for a standard ending. The most commonly used values in this case are: [32767], [65534], or [65535]. To warp to a specific/secret level within the same episode, use [0,1] to [0,11] (maximum [0,32] in EDuke32). The palette must be adjusted for this to work.
Palette : [0] = Standard: Warp to next consecutive level in episode. [>0] = Secret Level: Warp to level specified by Lo-Tag. This is used both to warp to secret levels, and to return from secret levels back to the next chronological level in the episode. The standard choice for palette value is 14.
TEXTURE# 146 MULTISWITCH, 147 (multiswitch), 148 (multiswitch), 149 (multiswitch)
The MultiSwitch can activate four different Activators which use four consecutive Lo-Tags. It activates them in ascending order (A,B,C,D) based on the Channel values. By placing two Activators per effect and assigning overlapping sequential tags to them, each activation of the MultiSwitch will disable/close the previous effect while simultaneously enabling/opening the next. Using this method with a set of three doors limits the player to a single pathway at any given time, and is the standard usage of a MultiSwitch. The following table demonstrates how to tag the Activators in a three-door MultiSwitch system.
| Activator #1 | Activator #2 | |
|---|---|---|
| Door #1 | A[0,Channel] |
A[0,Channel+1] |
| Door #2 | A[0,Channel+1] |
A[0,Channel+2] |
| Door #3 | A[0,Channel+2] |
A[0,Channel+3] |
It is also possible to use any of the three intermediate 'enabled' forms of the MultiSwitch sprite as alternatives. Note that doing so with a standard three-door setup will cause two of the doors to open simultaneously. This happens because one of the doors' initial activation was skipped, so instead it coincides with the initial activation of the next door. Which door will be affected depends on which intermediate 'enabled' form of the MultiSwitch sprite was chosen. While it is possible to fix this by making the affected door begin in the open position, it's easier to just use the initial MultiSwitch texture instead.
All of the switches in the game can be triggered by kicking them, including the MultiSwitch.
Lo-Tag : Channel. Set equal to Activator A Lo-Tag (also works with ActivatorLocked or MasterSwitch).
Hi-Tag : Activation sound number (optional). If no value is specified, the default is sound #76.
Palette : [0] = Appears in all modes. [>0] = DukeMatch-only (1 is the standard choice) (sprite must also be wall-aligned).
Activator Lo-Tags : A = Channel, B = Channel+1, C = Channel+2, and D = Channel+3.
TEXTURE# 160 DOORSHOCK, 2300 OOZ, 2309 OOZ2
The Door Shock can be used in any vertically moving sector. It will automatically stretch and compress itself according to the height of its sector. OOZ and OOZ2 are gory alternatives which function in the same manner.
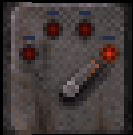
TEXTURE# 162 DIPSWITCH, 163 (dipswitch), 166 TECHSWITCH, 167 (techswitch), 1142 ALIENSWITCH, 1143 (alienswitch), 4359 TARGET, 4361 DUCK
The Combination Switch is used to unlock or activate something. All Combination Switches with equal Channel Lo-Tags will be used for the combination. The first three switch sprites can be used interchangeably within a combination, but the TARGET and DUCK sprites are considered independent, even from each other. Remember that you can use the 'enabled' form of the first three Combination Switch textures as alternatives. Note that you can halt certain effects by deactivating a combination during the effect's movement (the effect will continue when the correct combination is reinstated). This works with the TARGET and DUCK sprites as well, except you must repeat the full combination to halt the effect.
Combination Switch sound effects are automatic and cannot be changed. The defaults are sound #76 for DIPSWITCH and TECHSWITCH, and sound #272 for ALIENSWITCH. If the switches are linked to an ActivatorLocked, the first three switch types will display "unlocked"/"locked" messages and play sound #212 to indicate a change in status. The TARGET and DUCK sprites do not make any sound effects or display any messages to indicate the correct combination. They must be kicked or shot in order to be activated, and they do not work with all effects (such as switch-activated lights). They also require at least one sprite in the combination to have a Hi-Tag of 1, or they will not trigger the effect at all (you can even use a single sprite, so long as it has a Hi-Tag of 1). If you are using the TARGET or DUCK sprites, you must place them free-standing in wall-alignment mode and change their angle to the direction they will fall when shot. They also require being "true-centered" with the C key, otherwise they won't stay at their designated height after being shot.
The following applies to the first three switch textures only: If only one Combination Switch is used, the Hi-Tag will have no effect and it will function as a regular switch. If multiple switches are used, and all of the Hi-Tags are 0, then the correct combination is technically "all switches off". This can cause a few quirks, particularly if you begin the map with all of the switches already 'disabled': The correct combination will technically already be active, so that pressing any one of the switches will trigger the effect (due to the correct combination being disrupted), but all of the switches must be turned off again in order to deactivate the effect. If you were to begin the map with all of the switches 'enabled', then this can actually be considered a "feature", sort of like a reverse combination, except the objective would be to disable all of the switches. Note that beginning a map with the correct combination already active will invert the usage of an ActivatorLocked: The correct combination will lock the object, while any other combination will leave it unlocked.
All of the switches in the game can be triggered by kicking them, and the following switches can also be triggered by the player's gunfire (bullets only): DIPSWITCH (#162), DIPSWITCH2 (#164), DIPSWITCH3 (#168), HANDSWITCH (#1111), and of course, TARGET (#4359) and DUCK (#4361). These switches only respond to bullets, and (strangely) only to those fired by a player. The only exceptions to both of these rules are the TARGET and DUCK sprites, which react to almost all of the player's arsenal (including explosives), excepting only lobbed pipebombs, and of course the laser tripwire by itself has no effect. Most projectiles fired by enemies are also capable of knocking them over.
Lo-Tag : Channel. Set equal to Activator, ActivatorLocked, or MasterSwitch Lo-Tag to unlock/activate.
Hi-Tag : [0] = OFF in combination. [1] = ON in combination (TARGET and DUCK sprites technically work with any value >0).
Palette : [0] = Appears in all modes. [>0] = DukeMatch-only (1 is the standard choice) (sprite must also be wall-aligned) (does not work with TARGET and DUCK sprites).
Angle : Set to the direction that you want the sprite to fall when shot (only applies to the TARGET and DUCK sprites).
TEXTURE# 342 PANNEL1, 343 PANNEL2
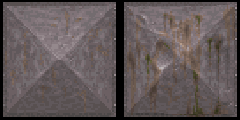
The Ventilation Panels are destructible panels used to simulate a true 3-dimensional ventilation system.
TEXTURE# 407 FANSPRITE, 595 GRATE1, 1113 CIRCLEPANNEL, 4099 PANNEL3
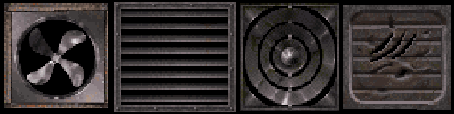
The Ventilation Covers are destructible sprites which can be used to cover ventilation openings.
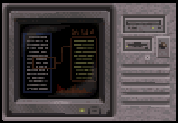
TEXTURE# 499 VIEWSCREEN2, 502 VIEWSCREEN
The Viewscreen is used to view through cameras placed around the map. It will view through all cameras with Lo-Tag set to Channel. The camera views can be cycled through with the action button. The player will still be vulnerable to attack, and will still be able to detonate pipebombs while using a viewscreen.
Hi-Tag : Channel.
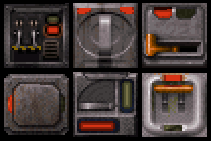
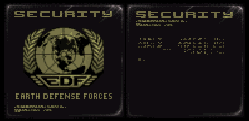
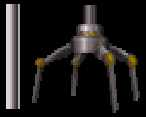
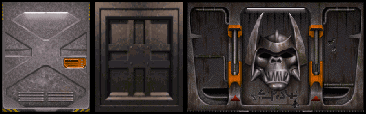
TEXTURE# 516 SATELITE, 517 FUELPOD, 602 SOLARPANNEL, 607 ANTENNA
![]()
The Destructible Space Objects are destructible sprites which do not play any explosion sound effects upon being destroyed. I imagine that 3D Realms had originally planned for outer space to be silent, thus these sprites make no explosion sound effects.
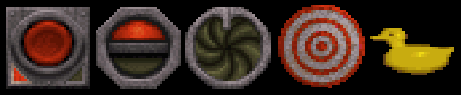
TEXTURE# 546 CRACK1, 547 CRACK2, 548 CRACK3, 549 CRACK4, 916 FIREEXT
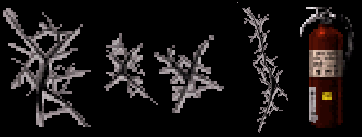
The Cracks or the Fire Extinguisher, when triggered, can be used to activate sector explosions (SE 13), and/or the explosive SEENINE/OOZFILTER canisters. Cracks are sensitive to explosions, and the Fire Extinguisher is sensitive to damage in general. Cracks or Fire Extinguishers which are linked with a Channel value will not trigger each other. However, a Fire Extinguisher placed within proximal range of a Crack will trigger it if damaged, due simply to the explosion (although such a setup would just be redundant). Similarly, a Crack or Fire Extinguisher can trigger SEENINE/OOZFILTER canisters, but this will not work in reverse, unless the canisters are placed close enough to the Crack/Fire Extinguisher to set it off due to the explosion (which, again, is redundant since the same could be done with any untagged explosive).
Hi-Tag : Channel. Set equal to SE 13 sprite(s) to activate, and/or SEENINE/OOZFILTER sprites (tangible or intangible) to activate.
Palette : [0] = Appears in all modes. [>0] Multiplayer-only (1 is the standard choice).
TEXTURE# 551 DOMELITE, 556 CHAIR1, 557 CHAIR2, 669 VACUUM, 678 SCALE, 685 CAMERALIGHT, 686 MOVIECAMERA, 689 IVUNIT, 694 POT1, 695 POT2, 697 POT3, 716 WAITTOBESEATED, 765 VASE, 768 SUSHIPLATE1, 769 SUSHIPLATE2, 774 SUSHIPLATE3, 779 SUSHIPLATE4, 792 SUSHIPLATE5, 954 BOTTLE1, 955 BOTTLE2, 956 BOTTLE3, 957 BOTTLE4, 969 HYDROPLANT, 971 OCEANSPRITE1, 972 OCEANSPRITE2, 973 OCEANSPRITE3, 974 OCEANSPRITE4, 975 OCEANSPRITE5, 979 HANGLIGHT, 1012 BOTTLE5, 1013 BOTTLE6, 1014 BOTTLE8, 1025 BOTTLE7, 1045 DONUTS, 1060 CLOCK, 1157 BOTTLE10, 1158 BOTTLE11, 1159 BOTTLE12, 1160 BOTTLE13, 1161 BOTTLE14, 1162 BOTTLE15, 1163 BOTTLE16, 1164 BOTTLE17, 1165 BOTTLE18, 1166 BOTTLE19, 1227 NUKEBARREL, 1358 FETUS, 1818 CANNONBALLS, 4367 HATRACK, 4370 DESKLAMP, 4372 COFFEEMACHINE, 4373 CUPS, 4374 GAVALS, 4375 GAVALS2, 4377 POLICELIGHTPOLE, 4388 FLOORBASKET, 4396 TOPSECRET, 4400 TEDDYBEAR, 4402 ROBOTDOG, 4404 ROBOTPIRATE, 4413 MAILBAG, 4427 HOTMEAT, 4438 COFFEEMUG, 4440 DONUTS2, 4444 TRIPODCAMERA, 4453 METER, 4454 DESKPHONE, 4458 GUMBALLMACHINE, 4464 MACE, 4465 GENERICPOLE2, 4495 WETFLOOR, 4496 BROOM, 4497 MOP, 4520 CHESTOFGOLD, 4530 FOODOBJECT1, 4531 FOODOBJECT2, 4532 FOODOBJECT3, 4533 FOODOBJECT4, 4534 FOODOBJECT5, 4535 FOODOBJECT6, 4536 FOODOBJECT7, 4537 FOODOBJECT8, 4538 FOODOBJECT9, 4539 FOODOBJECT10, 4540 FOODOBJECT11, 4541 FOODOBJECT12, 4542 FOODOBJECT13, 4543 FOODOBJECT14, 4544 FOODOBJECT15, 4545 FOODOBJECT16, 4546 FOODOBJECT17, 4547 FOODOBJECT18, 4548 FOODOBJECT19, 4549 FOODOBJECT20, 4550 HEADLAMP, 4554 SKINNEDCHICKEN, 4555 FEATHEREDCHICKEN, 4560 ROBOTDOG2 (robot? my ass!), 4576 SHOPPINGCART, 4591 DOLPHIN1, 4592 DOLPHIN2, 4871 MAN, 4887 PLEASEWAIT
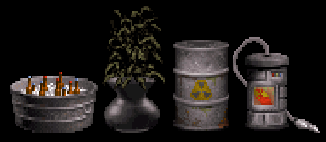
These are just random Destructible Objects. HYDROPLANT (#969) is glitchy after being shot twice (you can either turn off blocking so it can't be destroyed by non-explosives, or better yet, lower the sprite two units into the ground to hide the effect). BOTTLE7 (#1025) is actually a potted plant. BOTTLE10 (#1157) spawns money when destroyed. NUKEBARREL (#1227) sometimes spawns harmful ooz when dented. FLOORBASKET (#4388) spawns puke when destroyed. TOPSECRET (#4396) spawns paper when destroyed. MAILBAG (#4413) spawns mail when destroyed. HOTMEAT (#4427) spawns silent red WATERDRIP sprites to simulate blood dripping. FOODOBJECT1 (#4530), FOODOBJECT3 (#4532), and FOODOBJECT4 (#4533) cannot be floor-aligned or else they will continuously float upwards in the game (which basically renders them unusable, since they were clearly designed to be floor-aligned). This bug has been fixed for all affected floor-aligned sprites in EDuke32. FOODOBJECT5 (#4534) is invisible, but it can still be destroyed by explosives.
TEXTURE# 563 WATERFOUNTAIN, 569 TOILET, 571 STALL, 921 TOILETWATER, 981 HYDRENT
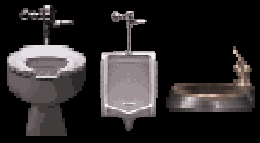
The Drinkable Objects make use of the TOILETWATER sprite to allow players to fill their health slowly with drinking water (hold the action button to drink). The running water sound effects are automatic. All of these sprites spawn TOILETWATER when broken (except TOILETWATER itself, of course). The Water Fountain can be used before and after it is broken, but it requires pressing the action button repeatedly in order to drink from it before it is broken. The Toilet and the Urinal provide a player with 10 health per use (before being broken), and the player has to wait to build up bodily fluids between each usage.
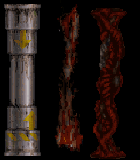
TEXTURE# 578 REACTOR2, 580 REACTOR2SPARK, 620 (prototype reactor), 1088 REACTOR, 1092 REACTORSPARK
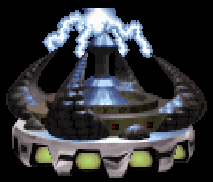
The Reactors are enormous, destructible sprites that damage players in close proximity, with a few special properties that separate them from other harmful sprites. The prototype reactor (#620) is decorative only and was added to this list just for being related in appearance. The other reactors cause damage to any player within close proximity. REACTOR2 seems unfinished, and was not used in the game. It animates by alternating with its own broken texture, and it spawns a REACTOR2SPARK. It looks quite awful, actually. The REACTOR, on the other hand, was used in Episode 2 of the game. To construct it, you must manually place REACTORSPARKs. It usually looks best if you have another REACTOR hanging upside down from the ceiling, with REACTORSPARKs connecting the two. When a REACTOR is destroyed, it disables all other REACTORs and REACTORSPARKs within the sector. It also appears to have the ability to halt Rotating Sectors when destroyed, by placing it within the same sector as the pivot point (SE 1) for rotation (as seen in E2L7.MAP: "Lunar Reactor", and E2L8.MAP: "Dark Side").
Lo-Tag : This was intended to be an optional Channel used to trigger a MasterSwitch when the reactor is destroyed (does not seem to work with Activator or ActivatorLocked). Unfortunately, even if the reactor doesn't use a Channel value, it triggers every MasterSwitch in the entire map when it is destroyed, regardless of Lo-Tag values. Thankfully, it will ignore any MasterSwitch with a time-delay Hi-Tag value, which at least salvages this feature as potentially useful.
Hi-Tag : Using a Hi-Tag value prevents the reactor from affecting any MasterSwitches when it's destroyed. Note that it will still stop Rotating Sectors.
Palette : [0] = Appears in all modes [>0] = Multiplayer-only (1 is the standard choice) (works with #578, #1088).
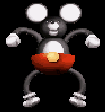
TEXTURE# 603 NAKED1, 753 STATUE, 869 STATUEFLASH, 1294 PODFEM1, 1312 FEM1, 1317 FEM2, 1321 FEM3, 1323 FEM5, 1325 FEM4, 1334 FEM6, 1336 FEM8, 1395 FEM7, 3450 FEM9, 4510 PIRATE1A / 4511 PIRATE4A, 4512 PIRATE2A / 4513 PIRATE5A, 4514 PIRATE3A / 4515 PIRATE6A, 4516 PIRATEHALF, 4864 FEM10, 4866 TOUGHGAL, 4874 WOMAN
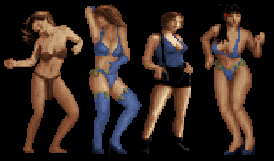
The Fem textures are purely for adolescent entertainment. You can place them in city maps as if they were civilians (dancing.. stripping.. civilians). Just pretend they aren't hookers. Some of them are in alien bondage, and some of them are actually mannequins/robots. If you press the action button on the STATUE, it will flash you (alternatively, you can use STATUEFLASH so it begins in the flashing pose then reverts back to normal). If you press the action button on a female trapped in slime, she will say "Kill me" (a reference to the movie "Aliens"). If you press the action button on the less-inhibited FEMs (strippers/hookers), Duke will throw cash and spout a pick up line (and FEM1 will give him the infamous display of appreciation). The PIRATE robot girls each have two separate animation speeds (For example, PIRATE1A and PIRATE4A are the same animation at different speeds). The PIRATEHALF robot is easily confused as representing a male, but it actually represents a female. The confusion arises because it is... let's say "exposed", but due to heavy pixellation and the fact that it is anatomically incorrect (i.e. lacks easily discernable nipples), many people assume it's supposed to be male.
Hi-Tag : Optional Channel. When the FEM actor is killed, it will trigger all RESPAWN[SpriteNumber,Channel] sprites. This only works with certain FEM actors. Check the "References - Compatibility Listings" section for the complete list.
TEXTURE# 616 PIPE2, 618 PIPE3, 619 PIPE1, 994 PIPE5, 995 PIPE6, 996 PIPE4, 911 CACTUS, 1069 PLUG, 1240 FIREBARREL, 1250 STEAM, 1255 CEILINGSTEAM, 1390 FIREVASE, 2271 FIRE, 2311 FIRE2
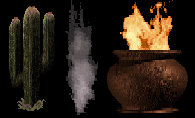
These are Harmful Sprites. They cause damage to the player. PIPEs are destructible. When destroyed, they spawn a wall-aligned STEAM sprite so that it appears to be 90 degrees anticlockwise from the pipe's angle (although technically it isn't). If a player presses the action button on a PLUG, they will receive an electric shock. FIREBARREL spawns fire when broken (which quickly burns out). FIREVASE spawns fire as well. FIRE and FIRE2 burn indefinitely, and you must use Ctrl + PGDN on them or else they won't do any damage (they float until the player spots them, resize the sprite to make it less noticeable). They will also not appear in an underwater sector.
TEXTURE# 621 CAMERA1
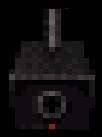
The Camera can be viewed through using a Viewscreen. The display order is determined by sprite numbers, with higher numbers appearing earlier in the sequence. This means that the display order will be the exact reversal of the order in which the cameras were placed.
Lo-Tag : Channel. Set equal to the Viewscreen Hi-Tag to be viewed through.
Hi-Tag : [0] = No rotation. [>0] = Rotation angle range (512 = 90 degrees both clockwise and anticlockwise, a total rotation range of 180 degrees). Very low rotation values will cause the camera to begin "malfunctioning" in a useful way. A value of 1 will smoothly and indefinitely rotate clockwise.
Palette : [0] = Appears in all modes. [>0] = Multiplayer-only (1 is the standard choice).
Shade : [<0] = Vertical tilt down. [>0] = Vertical tilt up.
Angle : Set to direction of camera view (initial and central direction if the camera rotates).
TEXTURE# 634 BOLT1, 4525 SIDEBOLT1

The Bolt sprite animates and causes the floor and ceiling of a sector to flash randomly with brightness (simulating a flash of electricity). The SIDEBOLT1 sprite does not cause any flashing.
TEXTURE# 658 (flickering red button), 659 (static red button)

This unnamed texture animates unlike any other texture in the game. It's some sort of flickering red button. I don't recall it being in the game, but I do remember seeing the static version of this texture used as a button in Duke Nukem: Zero Hour for Nintendo 64. Using the one-sided hidden switch trick, you could just as easily transform either version of this texture into a functioning button.
TEXTURE# 660 WATERDRIP

The Water Drip spawns random water droplets and plays the appropriate sound effects automatically. For variety, use different palette values and transparency settings. Note that when you try placing this sprite on the floor, it will become virtually intangible. You must place this sprite on the ceiling (just use S to place any sprite on the ceiling, then change it to a water droplet).
Hi-Tag : [0] = Play dripping sound effect. [>0] = Disable the dripping sound effect.
TEXTURE# 662 WATERBUBBLEMAKER

The Water Bubble Maker is used to spawn water bubbles when the player is near. Place it where you want the bubbles to spawn.
TEXTURE# 675 EGG, 1550 SHARK, 1680 LIZTROOP, 1681 LIZTROOPRUNNING, 1682 LIZTROOPSTAYPUT, 1715 LIZTROOPSHOOT, 1725 LIZTROOPJETPACK, 1741 LIZTROOPONTOILET, 1742 LIZTROOPJUSTSIT, 1744 LIZTROOPDUCKING, 1810 CANNON, 1820 OCTABRAIN, 1821 OCTABRAINSTAYPUT, 1880 DRONE, 1920 COMMANDER, 1921 COMMANDERSTAYPUT, 1960 RECON, 1975 TANK, 2000 PIGCOP, 2001 PIGCOPSTAYPUT, 2045 PIGCOPDIVE, 2120 LIZMAN, 2121 LIZMANSTAYPUT, 2150 LIZMANSPITTING, 2165 LIZMANJUMP, 2360 ROTATEGUN, 2370 GREENSLIME, 2630 BOSS1, 2631 BOSS1STAYPUT, 2710 BOSS2, 2760 BOSS3, 4610 NEWBEAST, 4611 NEWBEASTSTAYPUT, 4670 NEWBEASTHANG, 4671 NEWBEASTHANGDEAD, 4690 NEWBEASTJUMP, 4740 BOSS4, 4741 BOSS4STAYPUT
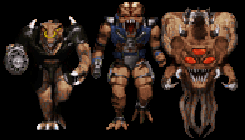
The Enemies give the player something to kill between objectives. STAYPUT textures force the enemy to stay within their source sector (this is useful for keeping them in sniper positions, etc). Note that PIGCOPDIVE is also technically a STAYPUT actor. There are lots of other special enemy textures as well. Four special textures worth mentioning are EGG (#675), CANNON (#1810), RECON (#1960), NEWBEASTSTAYPUT (#4611), and NEWBEASTJUMP (#4690), because they're the only enemy sprites which are affected in-game by their sprite size in the map editor (this is quite hilarious because you can make them absolutely enormous or incredibly tiny). The RECON requires at least one Locator to exist in the map, otherwise it will disappear upon sight of the player (after playing its recognition sound). The CANNON is included here because it is officially defined as an enemy, and it responds to the DNMONSTERS cheat. It appears to be semi-conscious, and will aim at someone and fire cannonballs if provoked. Enemies are compatible with virtually all cstat flags: palettes, transparency, flipping, relative alignment, even true-centering. Avoid using floor-alignment though, not only will the texture look meshed, but a bug in the game will cause the enemy to float upwards indefinitely. These issues have been fixed in EDuke32.
The following enemies are programmed with the ability to use an "operate" function on doors: Assault Trooper/Captain, Enforcer, Sentry Drone, Assault Commander, and the Protector Drone (although I haven't actually caught the last one in action yet). Protozoid Slimers are capable of consuming five varieties of enemies and their corpses: Assault Troopers/Assault Captains, Pig Cops, Enforcers, and Protector Drones. Just in case some people didn't know about this, you can nuke a Pig Cop Tank by pressing the nuke button on its backside.
Assigning a Boss a palette value of anything greater than 0 will turn them into a Mini-Boss affected by that palette value (21 is the standard choice). The Battlelord Mini-Boss has less than 1/4 the strength of the standard Battlelord Boss (1000/4500 to be exact). Note that the names of BOSS2 and BOSS3 are swapped in the game's internal naming scheme. Also note that BOSS2 (the Cycloid Emperor) can only travel in sectors with a Lo-Tag of 3 (it will be unable to move otherwise). Technically, this restriction does not apply to its Mini-Boss form, but this is utterly useless: The game will only give an Overlord or Cycloid Emperor Mini-Boss 1 hit point, meaning that they will die in a single shot, and may as well be considered incompatible. The Alien Queen is not compatible as a Mini-Boss. The only trait she shares with other Mini-Bosses is her smaller size. She is not weaker, she still ends the episode, she still crushes a player in proximal range, and she even still lays Protector Drones, despite being barely larger than them. The Alien Queen's electric shock attack has no range limit, but she will only initiate the attack if she can see the player. The Battlelord's mortar attack also has no range limit.
All of the Bosses (and Mini-Bosses) except the Battlelord automatically trigger a one-liner Duke taunt upon sight:
BOSS2(Cycloid Emperor) triggers sound #294: "It's down to you and me, you one-eyed freak!"BOSS3(Overlord) triggers sound #284: "I'll rip your head off and shit down your neck."BOSS4(Alien Queen) triggers sound #371: "I'm gonna kick your ass, bitch!"
The Battlelord in any form always plays a recognition sound effect (sound #97). The Overlord and Cycloid Emperor Mini-Bosses do not trigger the one-liner Duke taunt if they have a palette value of 1 (including if they were spawned from a Respawn sprite with a palette value of 1, since it will assign them the same palette value), and they will also play recognition sound effects that are otherwise never heard from them (Overlord: sound #151, Cycloid Emperor: sound #102). An Alien Queen in any form will always play the one-liner Duke taunt, but with a palette value of 1 you will also hear a recognition sound effect that is otherwise never heard from her as well (sound #342).
All of the Bosses trigger the Duke taunt "Die you son of a bitch." (sound #251) upon their death. Mini-Bosses have a 1/4 chance of triggering this taunt as well, except the Alien Queen in her "Mini-Boss" form, who is guaranteed to trigger it. The Overlord concurrently triggers the Duke taunt "Eat shit and die." (sound #266), but it is only played if the Overlord is in Mini-Boss form and the standard death taunt does not pass the 1/4 chance of being played. Similarly, the Alien Queen concurrently triggers the Duke taunt "It's time to abort your whole friggin' species." (sound #370), which is never played since her death in either form is guaranteed to trigger the standard death taunt which has overriding global priority. However, it is used again later in the Episode 4 cinema scene, so it is not absent entirely.
Note: Killing a Boss triggers the episode's ending cinematic (which is almost always Episode 1 since user maps are loaded as E1L8.MAP). Mini-Bosses do not trigger the cinematic, except the Alien Queen in her "Mini-Boss" form.
Lo-Tag : [0/1] = All skill levels. [2] = 2 and higher. [3] = 3 and higher. [4] = 4 only. (Skill settings have no effect on the EGG.)
Hi-Tag : Set equal to first Locator Lo-Tag to visit (affects RECON (#1960) only).
Palette : [0] = Default. [1] = Unfreezable. [4] = 'Shadow' enemy. [21] = Assault Trooper becomes Assault Captain (with teleporter/cloaking device). [>0] = Boss becomes Mini-Boss affected by palette value (21 is the standard choice) (only the Battlelord is usefully compatible with this feature). [>0] = Multiplayer-only (1 is the standard choice) (affects RECON (#1960) only).
Sector Lo-Tag : [3] = Allows the Cycloid Emperor Boss to roam in the sector.
TEXTURE# 680 CHAIR3, 904 WOODENHORSE, 1026 HORSEONSIDE, 4570 DUKEBURGER
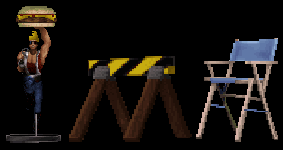
These are destructible 3D Objects which use multiple frames to display many angles. Duke has a sort of "slick" hairdo on the DUKEBURGER sprite.
TEXTURE# 762 MIKE

The Microphone will play the sound specified by its Hi-Tag when the player attempts to use it.
Hi-Tag : Sound number to play. This is one of the very few sprites in the game that will actually play the KICK_HIT sound when it has a tag value of 0.
TEXTURE# 901 STRIPEBALL, 902 QUEBALL, 903 POCKET

The Pool Balls and Pocket sprites are placed in a sector to simulate a functional pool table. The pockets must be floor-aligned, and the pool balls should not be able to leave their source sector (or else graphical problems will occur). None of these sprites are autosized in-game, so they must be manually resized. Use palette values on the pool balls for realism. In the game, the player can use the action button on the pool balls to play pool.
TEXTURE# 908 TREE1, 910 TREE2, 951 BOX, 978 CONE, 990 TIRE, 1062 RUBBERCAN
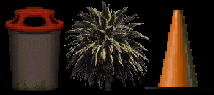
These are some random Explodable Objects. These can only be destroyed by an explosive blast. All of them will melt and spawn temporary fire, except RUBBERCAN, which does not melt and will only occasionally spawn temporary fire. The TIRE leaves a puddle of melted rubber behind, and the RUBBERCAN spawns rats when destroyed.
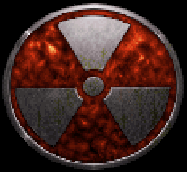
TEXTURE# 940 BOUNCEMINE, 1079 OOZFILTER, 1238 EXPLODINGBARREL, 1247 SEENINE, 4360 GUNPOWDERBARREL
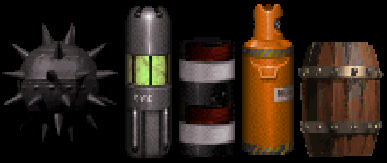
These sprites are Explosives, and all of them can be used to activate nearby Cracks or Fire Extinguishers. The Bounce Mine is a proximity-sensitive underwater explosive. The C9 and Ooz Filter can be used as time-delayed explosives, or to trigger SE 13 sprites. They share identical capabilites and differ only in appearance. If a C9 or Ooz Filter sprite is shrunken horizontally (x-wise) as much as possible (technically an xrepeat value of less than or equal to 8), it will become intangible in the game. If they will be intangible, raise them to the height at which you want them to explode. An intangible explosive must have a time-delay Lo-Tag value or else it will not visibly or audibly explode (although it will still shake the screen, spawn debris, and activate SE 13 effects as usual). It is also recommended to assign time-delay Lo-Tag values to linked tangible explosives, because in the case of multiple tangible explosives, only the one with the largest sprite number will visibly and audibly explode. Note that a direct hit to a tangible explosive will override its time-delay and cause immediate detonation. Try changing the palette values on any of the tangible explosives for variety.
You can also use a trigger (Switch or Touchplate) to activate an explosive or multiple explosives (SEENINE/OOZFILTER only, whether tangible or intangible). Link the trigger to a MasterSwitch with a Channel Lo-Tag, and place the MasterSwitch in just one sector containing an explosive. If there are multiple explosives, link them together with another Channel value (you can use the same value for everything for the sake of convenience).
Lo-Tag : Set equal to time-delay until explosion (a value of 30 = 1 second). A direct hit to a tangible explosive will override its time-delay and cause it to detonate immediately. Only compatible with SEENINE/OOZFILTER.
Hi-Tag : Channel. Set equal to SE 13 sprite(s) to activate, and/or other SEENINE/OOZFILTER sprites (whether tangible or intangible) to be linked with, or a CRACK/FIREEXT sprite to be activated by. Only compatible with SEENINE/OOZFILTER.
TEXTURE# 1020 SPOTLITE, 1630-1635 TRANSPORTER STAR
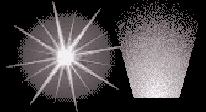
The Spotlight and the set of Transporter Star sprites can be used to simulate light beaming from a source. They work best with transparency. Use palettes for coloured lights.
TEXTURE# 1221 CRANEPOLE, 1222 CRANE
The Crane Pole and Crane are used in conjunction to simulate a working crane. The crane pole denotes the source sector for pickup, and the crane denotes the destination point. Cranes will automatically pick up 'active' objects in the source sector (including the player) and carry them to the specified destination point. Check the "References - Compatibility Listings" section for the complete list of compatible objects. The object doesn't necessarily have to be touching the floor, but this is virtually always the case.
Hi-Tag : Channel (links the crane and crane pole).
TEXTURE# 1226 BLOODPOOL, 2200 FECES, 4389 PUKE
Any player who steps in the Bloodpool will leave a few footprints behind. This is quite a fun sprite to use, because its palette value can transform it into many different liquids. Transparency gives the sprite a more liquid appearance. The PUKE sprite is an alternative. The FECES sprite is spawned occasionally by Enforcers in the game. Stepping on the Feces produces a Bloodpool sprite with a palette value of 7. The palette values given below are the only useful suggestions for the Bloodpool sprite (ignoring duplicate colours).
Palette : [0] = Harmful ooz. [1] = Water. [2] = Blood. [4] = Oil or melted rubber. [6] = Antifreeze. [7] = Muck/Feces (used as the leftover Feces puddle in the game).
TEXTURE# 1232 CANWITHSOMETHING, 4580 CANWITHSOMETHING2, 4581 CANWITHSOMETHING3, 4582 CANWITHSOMETHING4

The CanWithSomething is used to spawn an object when it is destroyed. It is worth noting here that these textures are defined in Atomic Edition's NAMES.H file as "SOMETHING", "SOMETHING2", "SOMETHING3", and "SOMETHING4". This contradicts all other versions of NAMES.H, as well as Atomic Edition's DEFS.CON file, so this may have been a mistake, but these textures will appear under those names if you're using Build with the Atomic Edition.
Lo-Tag : Set equal to the sprite number to spawn. Use any sprite number which has a name assigned to it (although many will not be compatible). Check the "References - Compatibility Listings" section for the complete list.
TEXTURE# 1267 RAT

The Rat squeaks and scampers away upon being spotted by the player. It will always travel in the same direction, but different rats choose different directions. The direction it chooses may be related to its sprite number. Eventually it disappears. It is technically defined as an enemy in the game code, so although it cannot be killed and doesn't count towards the map's total enemy tally, it will respond to the DNMONSTERS cheat. It works with different palettes too, for added exoticism.
TEXTURE# 1272 TRASH

The Trash is an unfinished sprite which jitters and bounces around in an attempt to simulate litter rustling in the wind. It will always travel in the same direction, but different trash sprites choose different directions. The direction it chooses may be related to its sprite number. It disappears when it reaches the nearest blocked or one-sided wall. It looks terrible, but I'm sure someone can find a use for it. It also works with different palettes.
TEXTURE# 1346 HELECOPT, 2491 DUKECAR
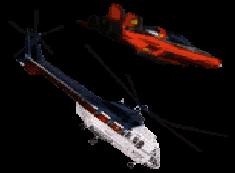
The Helicopter and Dukecar lose altitude and explode after a preset delay.
Angle : Set to direction of trajectory.
TEXTURE# 1352 MONK, 1353 SPACEMARINE, 1354 LUKE, 1355 INDY, 1356/1357 (Terminator), 1741 LIZTROOPONTOILET, 3400 BLIMP, 3419 ("Baby Ruth" chocolate bar), 4123 SCREENBREAK15 ("Itchy and Scratchy" screen), 4590 SNAKEP, 4943 JURYGUY, 4944 ("Pick up Bart")
These are Joke Objects that reference various mediums of popular culture, or are jokes in and of themselves. This is not even close to being a complete list, it's just the more prominent and obvious joke objects. This game is absolutely packed with pop-culture references, some of which are very subtle. The MONK is from an Apogee (aka 3D Realms) game called "Rise of the Triad: Dark War". The BLIMP displays "Duf Beer" on its side, which is an obvious reference to "Duff Beer" from "The Simpsons". The "Baby Ruth" chocolate bar (#3419) is actually not very obvious at all, since it's difficult to discern what the texture is even supposed to be (which provoked me to explicitly list it and make note of it here). It appears at the bottom of the swimming pool in E3L8.MAP: "Hotel Hell" and is a reference to the movie "Caddyshack".
Lo-Tag : Sound number to play when the sprite is destroyed (only applies to MONK, LUKE, INDY, and JURYGUY). These are some of the very few sprites in the game that will actually play the KICK_HIT sound when they have a tag value of 0.
Hi-Tag : Sprite number to spawn when the sprite is destroyed (only applies to MONK, LUKE, INDY, and JURYGUY) (optional). Use any sprite number which has a name assigned to it (although many will not be compatible). Check the "References - Compatibility Listings" section for the complete list.
TEXTURE# 1405 APLAYER
A Player is used to define Multiplayer start points. You must have a minimum of 7 sprites in the map for an 8 player DukeMatch game, and a minimum of 7 sprites in the map for an 8 player Co-Operative game (note that the Lo-Tag value distinguishes between these types). The maximum number of sprites that can be used in each case is 15, but placing more than 7 Co-Operative start points is useless. In both cases, the default player start position (set with Scroll Lock in 2D mode) accounts for the remaining start position (which is affected by the set height and angle). The other start positions are affected by the APLAYER sprite's height and angle.
The initial spawning order is determined by sprite numbers, with higher numbers appearing earlier in the sequence. This means that the initial spawning order will be the exact reversal of the order in which the sprites were placed. In a DukeMatch game, each player initially begins in the start position relative to their player number, but immediately afterwards the start positions are randomized. In a Co-Operative game, each player's start position is permanently set relative to their player number.
APLAYER sprites are automatically assigned different palette values during gameplay (in both Co-Operative and DukeMatch modes) so that the players can be easily distinguished from each other. The colours are always assigned in the same order (players 1-8 are assigned palette values 9-16 respectively), but players are also able to select their own colours in EDuke32. Because APLAYER sprites are coded to accept palette values, they are also permanently affected by palette values given to them in the map editor. The palette you assign to them in the map editor will override the palette they would otherwise have been automatically given. The only palette value which seems to affect a player's first-person colour is palette 1 (which also causes that player to permanently hover above the ground). This is probably a bug related to palette 1 defining a player as frozen. There is no way to assign a palette value to player 1 in the map editor, and players are not permanently affected by starting in a sector with a palette.
Lo-Tag : [0] = DukeMatch start position. [1] = Co-Operative start position.
TEXTURE# 1650 MORTER

The Mortar Shell is what the Battlelord lobs. I've never seen it used before, but it is absolutely perfect for a proximity mine. It explodes when any player gets too close. The mortar shell sprite is compatible with resizing and virtually all cstat flags: palettes, transparency, flipping, relative alignment, true-centering, etc. Floor-alignment will fracture the texture, though.
TEXTURE# 1705 LIZTOP, 1845 OCTATOP, 1870-1876 (pig cop scorpion tank), 2061 PIGTOP, 2160 LIZMANFEEDING, 2420 ORGANTIC, 2452 DUKEICON, 2686 (boss1top)
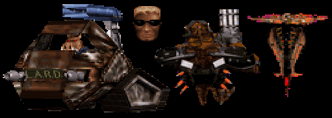
These are just a few Curiousities (unused and/or uncoded) textures that may be of interest. The enemy 'top' textures appear to be remnants of an intended plan to show all enemies from a top-down perspective in the game's map display. The Pig Cop Scorpion Tank is an uncoded alternative to the standard Pig Cop Tank. The LIZMANFEEDING and ORGANTIC are unfinished enemy variants, which are partially-coded and count towards a map's total enemy tally in the game. They also respond to the DNMONSTERS cheat. The ORGANTIC can be "killed", but the LIZMANFEEDING can not (although it does bleed when shot). The DUKEICON looks like an abandoned prototype for a mugshot status icon, as seen in many other first-person shooters of the era.
TEXTURE# 2333 FLOORFLAME, 2338 (continuous floorflame)

The Floor Flamethrower randomly spits flames and causes damage to any player within range. Unlike many other damaging flame textures, this one also causes the player to spawn a bit of blood. The flame sound effects are automatic. I'm rather surprised this wasn't used in the game. It looks very similar to the Floor Flamethrower seen in "Rise of the Triad: Dark War", another game by Apogee (aka 3D Realms). Note that you can also use #2338 for a continuous flame, but it makes no sound effects and isn't programmed to harm the player.
TEXTURE# 2566 TRIPBOMB
The Tripbomb is used on a flat vertical surface as an active tripbomb for setting traps. It is oversized by default, but the size will have no effect in-game (you can resize it if it bothers you). The beam will be triggered if a player, enemy, or moving sector disturbs it. The beam is also triggered by clipping abnormalities, which can occur in very large sectors with long walls. The beam will be reflected in mirrors, and tripbombs can even be placed on a mirror. Surprisingly, the explosion of an attached tripbomb will not destroy a mirror!
Lo-Tag : [0/1] = All skill levels. [2] = 2 and higher. [3] = 3 and higher. [4] = 4 only.
TEXTURE# 2590 FORCESPHERE

The Force Sphere is easily the most surprising unused object in the art files. It's quite hidden among unrelated textures, and looks very complex in action. The name is vaguely self-explanatory: When the sprite is triggered by the player's presence, it transforms into a spherical forcefield constructed from the base sprite. The player can climb inside the sphere through a hole in the top. Furthermore, firing at the sphere destroys the sprites, and causes the whole unit to begin spinning clockwise. Continuing to fire at the sphere slowly depletes the sprites until it does not have enough left to sustain itself and disappears. This behaviour makes it suitable for defending yourself from attackers. For best results, place the sprite either mid-air in a reasonably large room, or close to the floor (the second option makes it easy for the player to climb inside).
TEXTURE# 3400 BLIMP
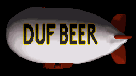
The Blimp spawns about a metric tonne of goodies when it's destroyed with an explosive.
TEXTURE# 3429 (vine)

This unnamed texture has no special properties, but it is unique in that it is one of the few traces of vegetation in the game. It would look great in any jungle or underground setting. Try different palettes for variety.
TEXTURE# 4340 LAVABUBBLE

The Lava Bubble randomly bursts. It wasn't used in the game, but I assume it was intended for the purple lava stream in E4L10.MAP: "The Queen". Use different palettes to change the type of liquid. The lava bubble emits no sound effects by itself, but you could simply use an ambient sound to achieve this (sound #88/#173 (both are identical) being the most appropriate suggestion).
TEXTURE# 4397 SPEAKER

The Speaker plays grocery store muzak until it is destroyed by the player. The audible radius is preset.
Hi-Tag : For some strange reason, giving this a large value (10000+) causes the sprite to rotate back and forth in succession. This seems to have been 'fixed' (disabled) in EDuke32.
TEXTURE# 4407 ROBOTMOUSE
This Annoying Robot Mouse just dances around and waffles on about nothing. Thankfully it is destructible. It is compatible with virtually all cstat flags: palettes, transparency, flipping, relative alignment, true-centering, etc. Avoid using floor-alignment though, not only will the texture look meshed, but a bug in the game will cause it to float upwards indefinitely. These issues have been fixed in EDuke32. It can also be resized for comic effect.
TEXTURE# 4480 (torn wire)

This unnamed texture is a torn wire which animates electricity. It looks great around technical equipment. Adjusting the palette offers a lot of variety.
TEXTURE# 4569 JOLLYMEAL

The Jolly Meal is a small food package which spawns atomic health when destroyed.
TEXTURE# 4890 NATURALLIGHTNING

The Natural Lightning is used to spawn a random lightning bolt when used with SE 28. Any number of lightning bolts can be attached to an SE 28. The lightning bolt is compatible with virtually any adjustment: flipping, transparency, palettes, resizing, and height. However, their relative alignment orientation must be face-aligned or they will not function. Use with WATERDRIP (#660) sprites and ambient rain sound effects (sound #358) to create a rainstorm. Giving the WATERDRIP sprites a Hi-Tag value greater than 0 will disable the dripping sound effects, if you would prefer to use only the ambient sound instead.
Hi-Tag : Channel. Set equal to SE 28 Hi-Tag.
TEXTURE# 4894 (storm icon)
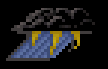
This is the storm icon from the weather channel room in E4L1.MAP: "It's Impossible". This texture has no functional significance, but it is still unique in that it is the only texture in the game which animates by alternating with a nonexistent texture (#4895), causing it to blink continuously.
Walls
TEXTURE# 120 TECHLIGHT2, 122 TECHLIGHT4, 124 WALLLIGHT4, 701 WALLLIGHT3, 703 WALLLIGHT1, 705 WALLLIGHT2
The Breakable Light textures can be used with an SE 3 for random flickering lights after being damaged. The wall must be a solid (non-masked) two-sided wall in order for this to work. This effect technically works with hittable masked walls, but the texture won't "break" when damaged. This effect will not work at all with a solid one-sided wall, although the texture will "break" when damaged.
Wall Lo-Tag : Channel. Set equal to SE 3 Hi-Tag.
TEXTURE# 130 ACCESSSWITCH, 132 SLOTDOOR, 133 (slotdoor), 134 LIGHTSWITCH, 135 (lightswitch), 136 SPACEDOORSWITCH, 137 (spacedoorswitch), 138 SPACELIGHTSWITCH, 139 (spacelightswitch), 140 FRANKENSTINESWITCH, 141 (frankenstineswitch), 146 MULTISWITCH, 147 (multiswitch), 148 (multiswitch), 149 (multiswitch), 162 DIPSWITCH, 163 (dipswitch), 164 DIPSWITCH2, 165 (dipswitch2), 166 TECHSWITCH, 167 (techswitch), 168 DIPSWITCH3, 169 (dipswitch3), 170 ACCESSSWITCH2, 712 LIGHTSWITCH2, 713 (lightswitch2), 860 POWERSWITCH1, 861 (powerswitch1), 862 LOCKSWITCH1, 863 (lockswitch1), 864 POWERSWITCH2, 865 (powerswitch2), 1111 HANDSWITCH, 1112 (handswitch), 1122 PULLSWITCH, 1123 (pullswitch), 1142 ALIENSWITCH, 1143 (alienswitch)
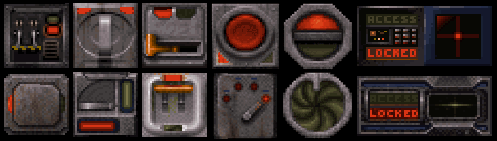
I was surprised when I first noticed in E2L8.MAP: "Dark Side" that the outer airlock switch is not a sprite, but a wall with tag values! This will only work on solid (non-masked) walls. All of the switches in wall form work identically to their sprite counterparts (minus TARGET and DUCK, which are not compatible for obvious reasons). Pressing them works, kicking them works (if applicable), shooting them works (if applicable), and tag values work. All other nuances such as the MultiSwitch and Combination Switch functions are intact. Of course, DukeMatch-only palette values do not work. The Access Switch is fully functional with different palette values, but note that the Access Card that Duke places in the slot will always appear to be the default blue. Remember that you can use the 'enabled' form of the switch textures as alternatives (except Access Switches of course). Refer to the individual sprite switch descriptions for more detailed information.
Wall Lo-Tag : Channel. Set equal to Activator, ActivatorLocked, or MasterSwitch Lo-Tag to trigger.
Wall Hi-Tag : Activation sound number (optional). Not applicable to Combination Switches. Sound #212 is the standard choice for Access Switches. If no value is specified, the default is sound #76.
Combination Switch Wall Hi-Tag : [0] = OFF in combination. [1] = ON in combination.
MultiSwitch Activator Lo-Tags : A = Channel, B = Channel+1, C = Channel+2, and D = Channel+3.
Access Switch Wall Palette : [0] = Blue. [21] = Red. [23] = Yellow.
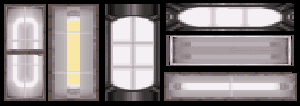
TEXTURE# 150 DOORTILE5, 151 DOORTILE6, 152 DOORTILE1, 153 DOORTILE2, 154 DOORTILE3, 155 DOORTILE4, 156 DOORTILE7, 157 DOORTILE8, 158 DOORTILE9, 159 DOORTILE10, 395 DOORTILE22, 447 DOORTILE18, 448 DOORTILE19, 449 DOORTILE20, 717 DOORTILE14, 781 DOORTILE16, 1102 DOORTILE15, 1144 DOORTILE21, 1169 DOORTILE17, 1178 DOORTILE11, 1179 DOORTILE12, 4391 DOORTILE23
The Door Tiles can be used to trigger an effect when the player either presses the action button on them, or kicks them. These textures will only work on solid (non-masked) walls. Oddly, these textures are also functional when used on sprites.
Note: If using an ActivatorLocked, it should not be used to unlock the same door that has the DOORTILE texture, because every time the player attempts to open it, the DOORTILE texture will simply trigger the ActivatorLocked and lock the door again!
Wall Lo-Tag : Channel. Set equal to Activator, ActivatorLocked, or MasterSwitch Lo-Tag to trigger.
Wall Hi-Tag : Activation sound number (optional).
TEXTURE# 230 BIGFORCE, 663 W_FORCEFIELD
The Big Force texture is used as an invisible forcefield. The W_Forcefield texture is used as a visible forcefield which causes damage to the player and can be toggled on and off. Both textures will only work on masked walls. Visible forcefields are prone to the HOM glitch if used on a 'solid' one-sided masked wall. Note that after being toggled, forcefields automatically revert to being a standard two-sided masked wall. It is not necessary to make visible forcefields blocked and hittable (they will be automatically). Try using different palettes on the W_FORCEFIELD for variety (be sure to adjust both sides for consistency).
Note: If you want to make a visible forcefield that won't harm the player, simply draw a wall at any distance in front of the forcefield and enable its blocking flag. Of course, the player will no longer be able to walk through the forcefield if it is deactivated, but projectiles will still pass through.
Wall Lo-Tag : Channel. Set equal to a Switch or Access Switch to be toggled by (W_FORCEFIELD only). This effect is not compatible with Touchplates. Technically, BIGFORCE can be toggled as well, but the tag value must be present on both sides of the masked wall, and when the invisible forcefield is reactivated, the BIGFORCE texture will become visible, making the effect cosmetically non-functional.
TEXTURE# 255 MASKWALL9, 285 MASKWALL1, 387 MASKWALL10, 391 MASKWALL11, 514 MASKWALL5, 609 MASKWALL12, 830 MASKWALL13, 913 MASKWALL2, 914 MASKWALL3, 915 MASKWALL4, 988 MASKWALL14, 1024 MASKWALL15, 1059 MASKWALL6, 1124 MASKWALL8, 1174 MASKWALL7, 1175 JAILBARBREAK
The Masked Wall textures can be used however you see fit. They can block players from getting somewhere. Some can be used to simulate curved doorway trim (as in E2L8.MAP: "Dark Side"). Of course, they can also be applied to sprites.
TEXTURE# 263 SCREENBREAK1, 264 SCREENBREAK2, 265 SCREENBREAK3, 266 SCREENBREAK4, 267 SCREENBREAK5, 268 SCREENBREAK6, 269 SCREENBREAK7, 270 SCREENBREAK8, 271 SCREENBREAK9, 272 SCREENBREAK10, 273 SCREENBREAK11, 274 SCREENBREAK12, 275 SCREENBREAK13, 806 OJ, 3370 BORNTOBEWILDSCREEN, 4120 SCREENBREAK14, 4123 SCREENBREAK15, 4125 SCREENBREAK19, 4127 SCREENBREAK16, 4128 SCREENBREAK17, 4129 SCREENBREAK18
The Screen Break textures are used on solid (non-masked) walls to simulate destructible television or monitor screens. All SCREENBREAK textures flicker randomly with static until destroyed by the player (the only exceptions being SCREENBREAK6-SCREENBREAK8, which are static). When destroyed, the texture will randomly display one of the three W_SCREENBREAK textures (#357, #358, #359). If you want to make a screen indestructible and without flickering static, simply assign the texture to a masked wall or sprite. It is worth noting here that SCREENBREAK14 (#4120) is defined a second time in Atomic Edition's NAMES.H file as "MIMON". This was probably a mistake, but the latter definition will override the former, so the texture will appear under that name if you're using Build with the Atomic Edition.
TEXTURE# 293 W_TECHWALL1, 297 W_TECHWALL2, 299 W_TECHWALL15, 301 W_TECHWALL3, 305 W_TECHWALL4, 306 W_TECHWALL10, 307 W_TECHWALL16, 4130 W_TECHWALL11, 4131 W_TECHWALL12, 4132 W_TECHWALL13, 4133 W_TECHWALL14, 4134 W_TECHWALL5, 4136 W_TECHWALL6, 4138 W_TECHWALL7, 4140 W_TECHWALL8, 4142 W_TECHWALL9
The Tech Wall textures are used on solid (non-masked) walls to simulate destructible technical equipment. If you want to make a Tech Wall indestructible, simply assign the texture to a masked wall or sprite.
TEXTURE# 407 FANSPRITE
![]()
The Fan is used on a masked wall (or sprite) to simulate a destructible fan. This texture will not be destructible if used on a solid (non-masked) wall or a 'solid' one-sided masked wall.
TEXTURE# 198, 503 GLASS, 504 GLASS2, 510 STAINGLASS1, 511, 758

The Glass textures are used on masked walls to simulate either destructible or indestructible glass. GLASS and STAINGLASS1 are both destructible (the latter spawns colourful shards). These textures will not be destructible if used on a 'solid' one-sided masked wall. #198, GLASS2 (which are identical textures), and #758 can be set as transparent and used as indestructible glass. #511 is an alternative (albeit unbreakable) stained glass texture portraying Duke Nukem that was apparently not used in the game. Of course, none of these textures will be destructible if used on sprites.
TEXTURE# 560 MIRROR

The Mirror is used to define a 'solid' one-sided masked wall (set with the 1 key) as a mirror. Make sure you set it as blocked and hittable. In the game, mirrors reflect shrink rays, and can be blown up with explosives. The lasers fired by Assault Troopers/Captains are also reflected by mirrors. Tripbomb laser beams will be reflected in mirrors, and tripbombs can even be placed on a mirror. Surprisingly, the explosion of an attached tripbomb will not destroy a mirror! The only explosions which seem to be able to destroy a mirror are from pipebombs, the RPG, or intangible time-delayed explosives (SEENINE/OOZFILTER). The direct impact of a devastator rocket or a lobbed pipebomb will also break a mirror. All other causes of explosion (tripbombs, mortar shells, underwater spiked mines, tangible canisters or barrels, etc) seem to have no effect. Note that mirrors will be destroyed by explosives regardless of blocking/hitscan flags, but they still must be set to prevent the player from walking into the mirror (the mirror will shove the player back out, but it still causes momentary graphical glitches). When a mirror is destroyed, it displays the texture MIRRORBROKE. You may notice that the broken mirror texture is not properly aligned. To fix this, temporarily swap the MIRROR texture with MIRRORBROKE (#70), align it however you want, then swap it back to the MIRROR texture. Mirrors are very susceptible to the HOM (Hall Of Mirrors) glitch. There are a variety of causes for the HOM glitch. Check the "References - FAQ" section for details on the subject and methods of avoiding it.
Wall Lo-Tag : Sound number to play when the player presses the action button on the mirror (sound #252: "Damn, I'm lookin' good!" is the standard). Technically, this will work on any wall with the MIRROR texture overtile (masked texture), not just 'solid' one-sided masked walls. Effectively, this allows you to make any texture seemingly play a sound effect, simply by hiding a masked and tagged MIRROR texture in front of it.
Wall Palette : [4] = Defines mirror as indestructible (EDuke32-only). While mirrors themselves are not affected by palette values, the MIRRORBROKE (#70) texture that remains after the mirror is destroyed will be affected by a palette.
TEXTURE# 867 ATM, 1212 VENDMACHINE, 1215 COLAMACHINE, 4181 W_MILKSHELF
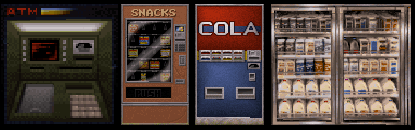
The Destructible Dispensers are used on solid (non-masked) walls. Use palettes for variety. The ATM spawns money when broken. If you want to make a Dispenser indestructible, simply assign the texture to a masked wall or sprite.
Floors/Ceilings
TEXTURE# 78 CLOUDYOCEAN, 79 CLOUDYSKIES, 89 LA, 94, 95, 96, 97, 98 REDSKY1, 99 REDSKY2, 199

These are Non-Lethal Parallaxed Sky textures. CLOUDYSKIES is unique in that it's the only sky texture which moves. #199 is perfect for a cloudless blue sky. LA is a parallaxed texture 'set' from #89-93 (meaning you only need to paste the first texture and the rest is displayed automatically after reloading the map or running the game). Remember that if you use a parallaxed texture set, you cannot use any other parallaxed textures in the map! Check the "References - FAQ" section for more information on that. For variety, try using different palette values on sky textures. Note that you are not limited to using only these textures. You can parallax any texture. Also note that you can use any textures designed for parallaxing on walls instead.
TEXTURE# 80 MOONSKY1, 84 BIGORBIT1
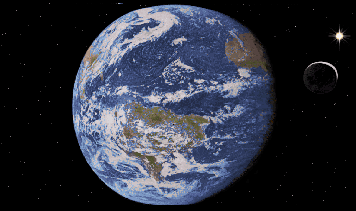
These are Lethal Parallaxed Sky textures. A parallaxed MOONSKY1 or BIGORBIT1 texture is used to define a sector as outer space. These textures display a 'set' or sequence of textures (meaning you only have to paste the first texture and the rest is done automatically after saving and reloading the map or running the game). MOONSKY1 displays from #80-83, and BIGORBIT1 displays from #84-88. Remember that if you use a parallaxed texture set, you cannot use any other parallaxed textures in the map! Check the "References - FAQ" section for more information on that. Any player who enters a space sector will die immediately. This can be bypassed with the ceiling palette (the floor palette has no effect, even if the texture is only parallaxed on the floor!).
Ceiling Palette : [0] = Lethal. [>0] = Bypasses death effect (3 is the standard choice because it does not affect the colour).
TEXTURE# 120 TECHLIGHT2, 122 TECHLIGHT4, 124 WALLLIGHT4, 701 WALLLIGHT3, 703 WALLLIGHT1, 705 WALLLIGHT2
The Breakable Light textures can be used with an SE 3 for random flickering lights after being damaged. They can also be used without a Hi-Tag as the ceiling of a switch-activated light sector to make destructible lights.
Ceiling Hi-Tag : Channel. Set equal to SE 3 Hi-Tag.
TEXTURE# 200 FLOORSLIME, 859 HURTRAIL, 1082 FLOORPLASMA, 4240 PURPLELAVA
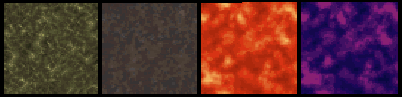
These are Damaging Floor textures. They will cause damage to any player touching the floor. The FLOORSLIME and FLOORPLASMA textures cause the player's view to have a green tint and a red tint respectively. The HURTRAIL texture causes electrical damage to the player. The PURPLELAVA texture causes hyper-destructive damage to any player within the sector (whether or not they are touching the floor), and it can even be used on the ceiling for the same effect. If a player is wearing protective boots, they will be temporarily guarded from the damage. If a damaging floor texture (except PURPLELAVA) is used under a player's inital start position, that player will start weaponless (this only works once, subsequent spawns will not be affected). If FLOORSLIME is used on the ceiling of an underwater sector, the entire sector will have a green tint. If used on the ceiling of the player's initial sector, it has the strange effect of causing the view to be permanently green (at least until the colour is reset by going underwater or using nightvision goggles).
TEXTURE# 342 PANNEL1, 343 PANNEL2
The Ventilation Panel textures will trigger duct sound effects whenever a player is moving along the floor texture.
TEXTURE# 1293 BLANKSCREEN, 3026 BLANK, 5064 (alternative blank)
These are Blank textures which can be used to make any object black without altering its palette value. This is most useful on floors, but can be used on sprites, walls, and ceilings as well. BLANK is the only completely pitch black texture, the other two are alternatives with lighter shades of black. #5064 is a slightly lighter shade, and BLANKSCREEN is the lightest shade.
TEXTURE# 2821 SMALLFNTCURSOR
The Small Font Cursor is just a pure white texture. It can be used on walls as well, but it will have a series of "notches" in the texture unless it is stretched out as much as possible (this happens because the texture's dimensions are not powers of 2). It also works well with palettes.