
This is by far the most elaborate effect described in this guide. Credit to Gijs de Vries, the inventor of this effect, whose map I tore apart to figure out how it worked. This effect uses a combination of three different effects: Stretching/Shrinking Sectors, Submergible Water With Sloped Surfaces, and Rising/Lowering Ceilings and Floors. When a switch or Touchplate is activated, all of these effects combine to make Rising Submergible Water on a Sloped Surface. This demonstration is very specific, so follow each step to the note. Once you've finished making the effect for the first time, you should understand it enough to make your own in any style you wish.
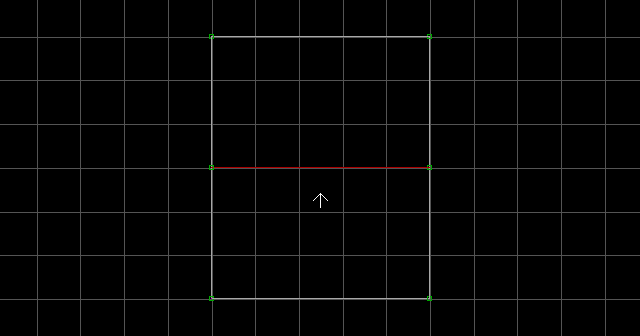
Begin by switching to the largest grid size and creating these two sectors. The sector on the bottom is just for the player to start in. We'll be focusing on the top sector. It is very important that your top sector be exactly 5 grid squares horizontal, 3 grid squares vertical on the largest grid size. This is important because the values given to you throughout this example are designed with this exact setup in mind.
Create two rectangular sectors adjoining the left wall of the top sector. Don't worry about their size, because they will be resized and moved in the following steps.
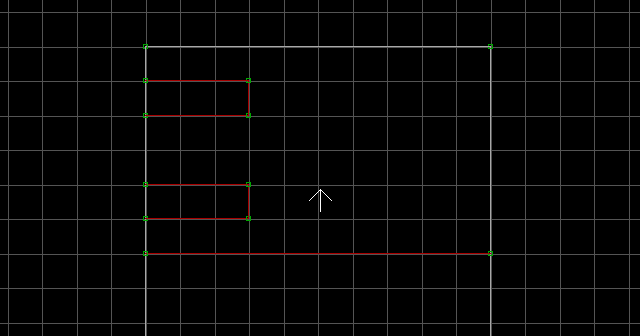
Switch to the smallest grid size. Move the two rectangular sectors to the following positions. Note that one vertex from each sector will be overlapped and deleted. I turned off the grid in the image so you could see the sectors clearly. It is very easy to screw up on this step, so examine the image carefully. Each sector had one vertex which was overlapped and deleted when connected to the nearest corner.
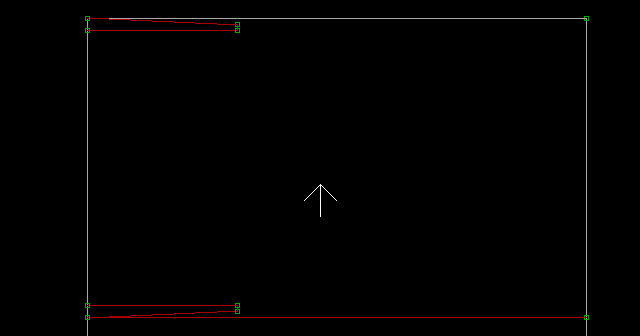
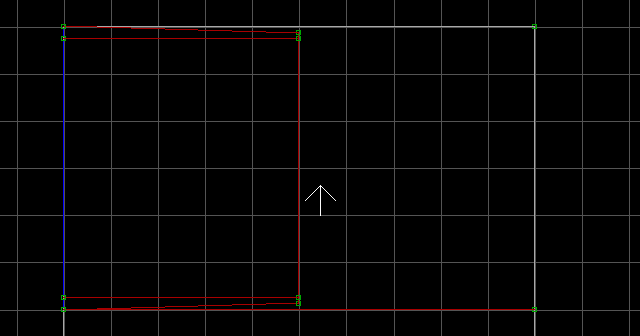
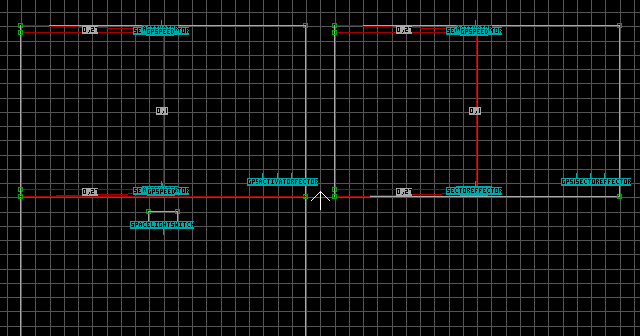
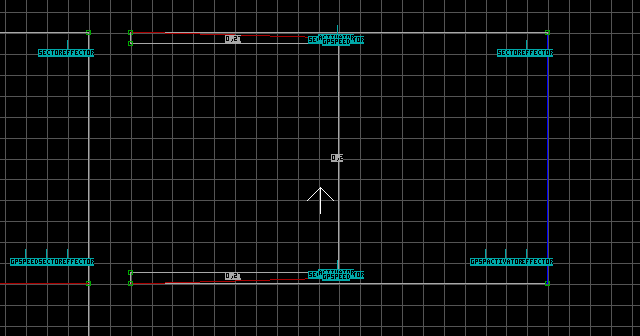
Join the two sectors with a wall. Move the new wall and sectors to the exact middle of the bounding sector (use Right Shift to highlight them all at once). You may need to switch to a larger grid size to determine the location of the bounding sector's midpoint. Set the 'first wall' of all three sectors (with Alt + F, shown as blue in the image).
Switch to 3D mode and use the ] key on the floors of all three sectors to slope them. press the ] key exactly 3 times per sector. Texture the flat floor with water and lower it until it matches the lowest point of the sloped sectors.
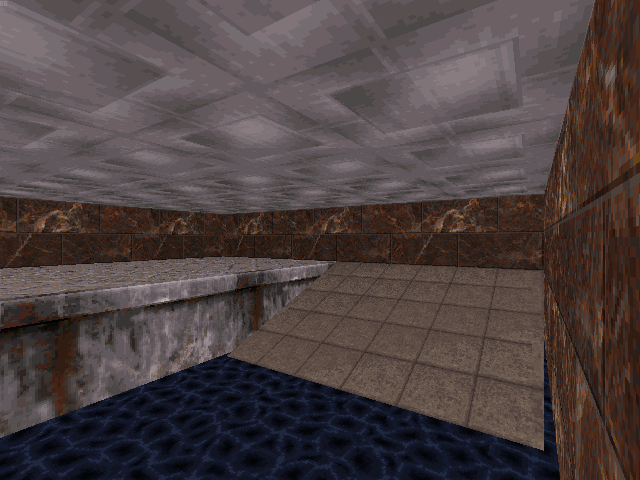
From here on, the flat water sector will be referred to as the 'above-water sector'. Switch to 2D mode, and tag the above-water sector [0,1]. Tag the two thin sloped sectors [0,27]. Turn grid locking off (with L) and place the following sprites inside the two thin sloped sectors: S[0,20], A[0,Channel], Speed[0,OpeningDistance] (these sprites must be placed within close proximity to each other, or else the effect will not work properly). Angle both S sprites to the left in 2D mode (so the sector will shrink when first activated). For OpeningDistance, use a value of 2600. That value works best just for this demonstration, but you'd have to experiment with it if you had sectors of a different size.
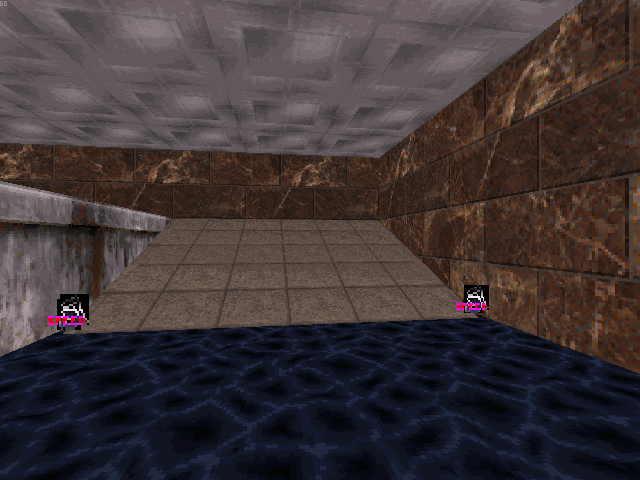
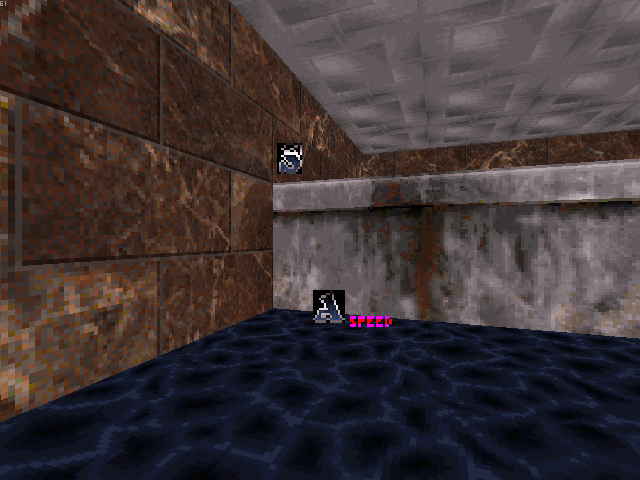
Turn grid locking back on (with L). Add the following sprites to the above-water sector: S[0,31], A[0,Channel], Speed[0,RiseSpeed]. For RiseSpeed, use a value of 48. Again, that value works best just for this demonstration, but you may have to experiment with it if you use a different setup. Make sure the angle of the S is facing up. Raise the S until its bottom matches the height of the slope's highest point (or just use the floor beside it as a reference like I did). The height of the S indicates the water's final height.
Place either a T[NumberOfActivations,Channel] or a Switch tagged [ActivationSound,Channel] (to trigger the rising water). NumberOfActivations is the number of times the Touchplate will activate the water (0 being infinite). I suggest a Switch because it makes things easier for the moment.
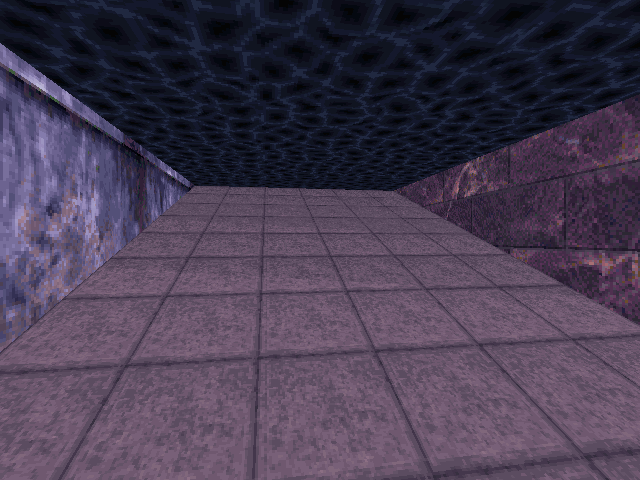
We're going to take a break and test how the effect is coming along. We're still only about half-way through setting up the effect, but it's good to take a break and see how it looks so far. From the test we can conclude if something has gone wrong in the process. If your water rises up the slope smoothly, and stops when it reaches the top of the slope, you've done everything correctly so far. Now, supposing something did go wrong (and there's a good chance something will), don't panic. Here are a few problems and solutions:
- The water rises to the wrong height/doesn't rise at all!
- The water doesn't travel far enough up the slope/The water travels too far up the slope causing it to crash right through the wall!
- The water rises smoothly the first time I activate it, but after that it seems to pause before moving!
- The water reaches the wall and rises to the proper height, but it moves way too fast/slow looking totally fake!
Check that you've placed the three sprites in the above-water sector and tagged them accordingly. Also make sure the S is angled up and raised to the proper height. If the water doesn't rise at all, check to make sure the Switch and Activators all have the same Lo-Tag (Channel).
This probably means you didn't pay attention during step one where I emphasized that the sectors be exactly the same size as in the image. But you may have just entered the wrong value for OpeningDistance. The correct value is 2600. If your value is correct but you still have a problem, you've done something wrong in the first few steps. Fixing this will take some experimenting, but it's quite simple. If your water travels too far up the slope, try smaller values for OpeningDistance until something works. If your water doesn't make it far enough up the slope, try larger values for OpeningDistance until the water reaches the top of the slope.
You've mistakenly given the S[0,31] a Channel Hi-Tag. In fact, the Hi-Tag is an undocumented Delay value. Leave it as 0.
I have no idea how you pulled that off, but it means you need to adjust your water's RiseSpeed.
Hopefully you've got everything working properly up to this point. This is a very complex effect so it's expected that everyone will run into problems at some point. What we have left to do is make the water submergible and get the underwater sector to rise/lower properly. First we copy the whole above-water setup. Highlight the sectors (using Right Alt) and press Insert. Then use the Left Mouse Button to drag the copied sectors over to the right (although this isn't reflected in the image below, you should move the copy an even number of spaces on grid size 1, or twice that amount per grid resolution; This will keep the floor/ceiling textures in proper co-ordination with the above-water texture alignment). Once you've got a copy made, press Right Alt to make it stop flashing green.
The copy will now be referred to as the below-water sector. Use Right Ctrl + Delete to delete the large sloped sector between the two thin sloped sectors. Change the below-water sector's tag from [0,1] to [0,2]. Assign the below-water sector's 'first wall' to be the lowest point of the slope (with Alt + F, shown as blue in the image). Place an S[Channel,7] in the exact same place in each water sector.
Switch to 3D mode. Texture the ceiling as water and texture the floor with the same texture as used on the above-water slope. Use the [ key exactly 3 times to slope the floor so it matches the slope above the water. Flatten the slopes of both thin sectors, then raise their floors until they touch the ceiling.
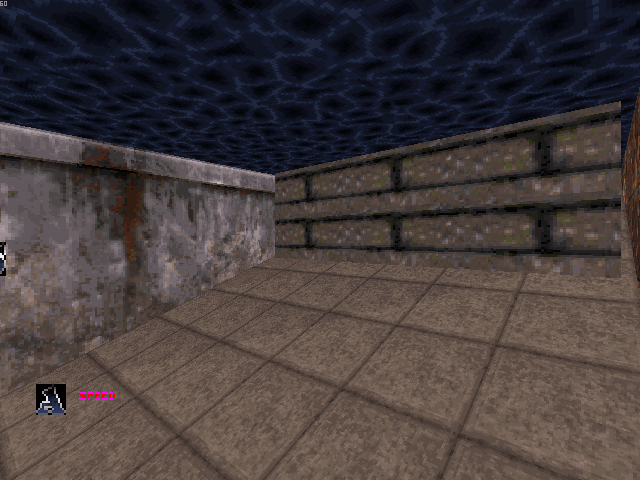
Change the tag of the below-water S[0,31] to S[0,32]. Angle it so its tail faces down. This changes it from a floor rise effect to a ceiling rise effect. Now the height of the S indicates the water's initial height, and the height of the ceiling indicates the water's final height. Our S is already set to the right height, so all we need to do is make the ceiling match the height of the slope's highest point. For this particular setup, all you have to do is press PGDN once on the ceiling. If you had a different setup, you would have to experiment to get it just right. Use the O key to orientate the walls of the below-water sector. This will force them to stay motionless while the water rises. Finally, you can test the finished product. This is what it should look like when raised:
There are a few things you can do to make the effect look smoother. You can pan the wall textures of the above and below-water sectors so they match. You can also try to hide the ugly ceiling movement above the thin sloped sectors by making them even thinner. One last thing, you could use a MasterSwitch in place of the Activator if you want the water to rise only once.
Now, in case something went wrong and your finished effect doesn't work, here are some more problems and solutions:
- The below-water ceiling rises/lowers too far!
- I have problems submerging into the water!
- The below-water sector doesn't work at all!
If the water rises too high, lower the ceiling a few units and try again. If the water lowers too far down, raise the S a few units. Keep experimenting and testing until it works properly.
The above-water sector must be tagged [0,1], and the below-water sector must be tagged [0,2]. Make sure the above and below-water S sprites are in the exact same location in each sector. Also check that they are tagged correctly. The above-water S must be directly on the floor. The below-water S must be at the exact same height as the floor would be if the floor was flat.
You may have accidentally deleted some sprites, or changed sector Lo-Tags. Make sure the two thin sectors are tagged [0,27], and that all of the sprites are present and tagged accordingly. A quick rundown: You should have three sprites per thin sector (which must be placed within close proximity to each other), and four per water sector (both above and below). Also double check that the sprites which need to be angled are facing the correct direction. If the whole thing seems to be falling apart, start over and follow the steps more carefully. Believe me, I understand the aggravation involved in creating this effect (I had to reverse-engineer it and write this tutorial).