
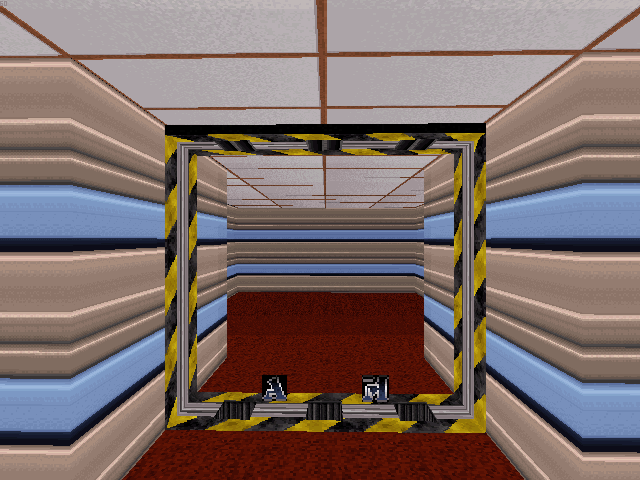
Teeth Doors are similar to Ceiling Doors. They open and close like a Ceiling Door, except they have prongs (teeth) inside of them, which embed themselves deep into the ground when the door is closed. These doors were not used in the game, and they have some minor problems: If the door is interrupted before finishing a complete open/close cycle, the prongs will become increasingly more offset from the door with each interruption. To avoid these problems, link the door to a switch (as in this demonstration), and never interrupt the door while it's closing by stepping under it.
Create the door sector. Place as many prong sectors as you'd like inside the door. Most Teeth Doors are constructed reasonably larger than an average door.
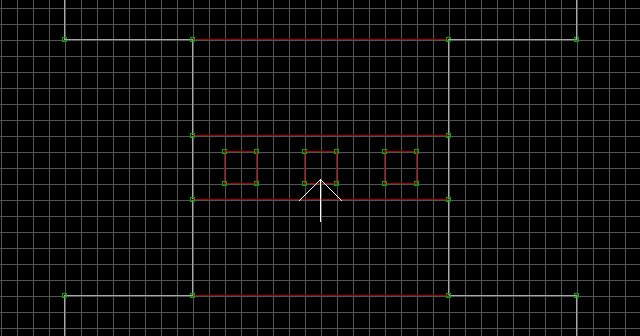
Tag the door sector [Channel,29] (do not tag the prong sectors). Place an S[Channel,22] inside each of the prongs. Place the following sprites within the door sector: A[0,Channel], M[StopSound,StartSound] (S[Delay,10]).
Texture the door's frame, and press O on each wall of the frame to orientate them to the floor (this forces them to remain motionless while the door operates). Temporarily lower the prongs and texture them, then raise them back up to the ceiling. This next bit is sort of complicated. When the door is operated, the prongs will move much faster than the door itself. If you want the prongs to match up perfectly with the ceiling after every door operation, you will need to lower all of the prong floors by an exact amount of units. I have devised a simple formula to deduce this specific value:
(DoorHeight / 4) + DoorHeight + 2.25
DoorHeight is the total height of the door in PGUP/PGDN units. The solution to this formula is how many times you must press PGDN on each prong floor. If you are using Build, just round off the remaining decimal values.
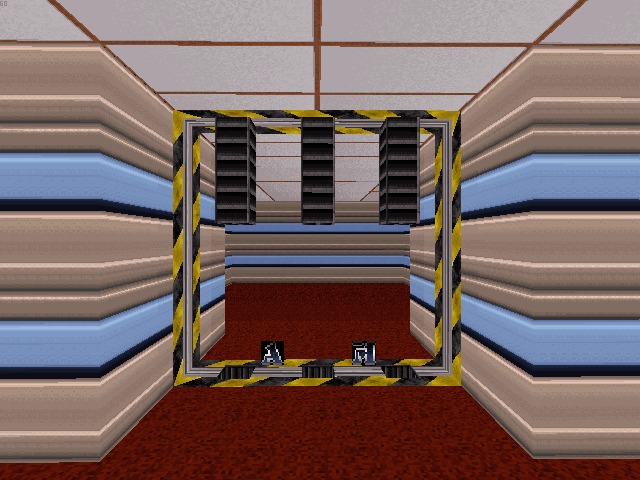
Temporarily lower the door and texture both sides of it. If you want the door to be initially closed, lower the prongs as deep into the ground as they go, and lower the door's ceiling to the floor. If you want the door to be initially open, raise the door and prong ceilings to 1 unit below the surrounding ceiling (as in the image). An open door also requires an additional formula to keep the prongs matched up with the ceiling after the door is operated:
(DoorLoweredUnits X 1.25) + 2.25
DoorLoweredUnits is the number of PGUP/PGDN units the door's ceiling has been lowered (we used 1 unit in this demonstration). The solution to this formula is how many times you must press PGDN on each prong ceiling starting from the door's current ceiling height. If you are using Build, just round off the remaining decimal values.
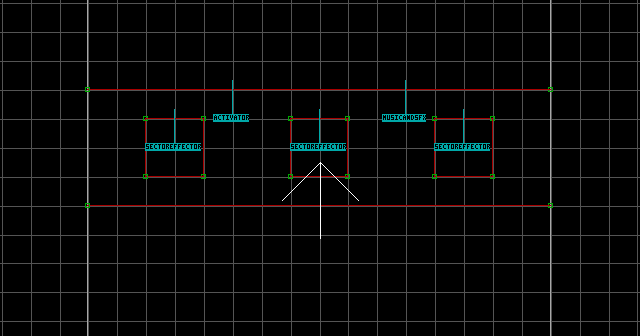
Place either a Switch tagged [ActivationSound,Channel], or else a T[NumberOfActivations,Channel]. NumberOfActivations is how many times the Touchplate will activate the Teeth Door (0 being infinite). Neither of these are technically mandatory: Excluding them allows the door to be operated with the action button. However, it will be more prone to developing problems during gameplay without something to constrain its operation to uninterrupted open/close cycles. Nevertheless, I did not use switches for the Teeth Doors in TUTORIAL.MAP, because I found them too cumbersome.